PVC, low cost ride on railroad: How to make
“PVC rapid track”
The key to low cost
and ease of construction is using pvc tracks. Track construction was previously
described and costs approximately $1 dollar per foot. 10 foot
sections of track can be made in about 30 minutes. Tracks are durable, will not rust, and
are weather resistant and can be left outside. Tracks are lightweight, and can be easily
dissassembled for storage, and
reassembled in the same or new configuration. Traditional “live steam” uses
7.5, or 7.25 inch spacing. I used 8
inch rail spacing for slightly more lateral stability of cars carrying
children. My trains are not
compatible with traditional live steam, so it is your choice of spacing of
rails.
PVC track is 1/10th
the cost of steel track, and easy to assemble and make curves and switch
tracks, as will be described below.
Once your on a roll, it takes about 30 minutes
to construct a 10 foot section of straight or curved track. Switches take more time.
PVC track component
costs
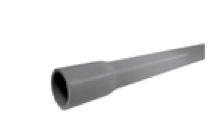
Electrical gray ½ inch pvc pipe 10 foot= $1.60
1 by 2 pressure treated wood x 8 feet=$2
misc: screws
cost per 10 foot of track (8 inch wide rail spacing on 1 foot long ties spaced every 6 inches)=$8.20 plus cost of misc or no more than $10 per 10 feet
Make sure you use electrical gray colored ½ inch pvc pipe because it is UV protected. The white and black and tan colored pvc pipe is not. Electrical pvc has the least chance of cracking in the sun. Gray rails on brown or natural wood ties are visually pleasing also.
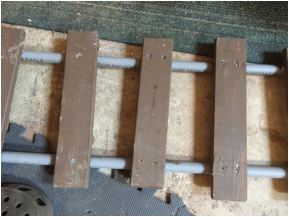
The track is assembled by screwing through the underside of the ties into the pvc using screws long enough to catch 1 side wall of the pvc pipe (3/4 inch long, but depends on thickness of your ties). Screws should not perforate the top of the rail. Note that in the pictures, I used recycled wood painted brown. For durability, I recommend using pressure treated wood.
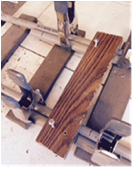
Assemble by predrilling 4 through holes at 8 inch spacing in
each tie, then use a jig to hold rails in place with
proper spacing upside down. Then, screw in to secure. Make 2 jigs by drilling 2, 1 inch holes
spaced 8 inches center to center in a 2 by 4; then cut the 2 by 4 in half. 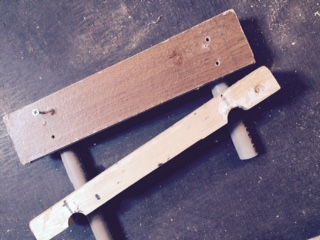
Another track spacing jig is shown above.
The last step is to fill the track with play sand to make it more rigid. It can support my weight (200 lbs). Start by placing silicone sealer plug about 2 inches from the end of both rails at one end of a 10 foot track section. Then the track is stood up vertically next to a 10 foot ladder. Simply stand on the ladder, and fill funnel the sand into each rail. This is the hardest part of track construction. You will have to vibrate or tap the track on the ground to get the sand to settle. Note that if your railroad only has to support the weight of the trains and small children, then there is no need to fill track with sand. Sand filled track supports my weight (200 lbs). When each rail is fully filled, a 9/16th inch dowel is inserted with silicon sealer to plug the ends and serve as a connector to the next track section.
10 foot track sections are connected by with ½ inch screws inserted through the pvc rail into the dowel within to hold tracks together on the outer rail edge only.
Making Curve tracks:
The easiest way to make curve track is to create a large circle out of 10 or more, 10 foot pvc pipe sections. C=pi x D. 100 = 3.14 x D. D= approx. 32 feet. The radius of the curve is 16 feet. This is the steepest curve I would use. More shallow or larger radius curves are preferable if you have the space.
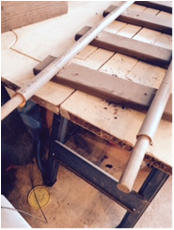
It is easy to make this 100 foot or larger circumference circle because pvc pipe has a flange at one end that accepts the next 10 foot pipe section as shown above. Once a circle is made, place another pvc rail in parallel, and then using the 8 inch spacing jig, screw down predrilled ties at 6 inch spacing. This process is shown in the figure below.
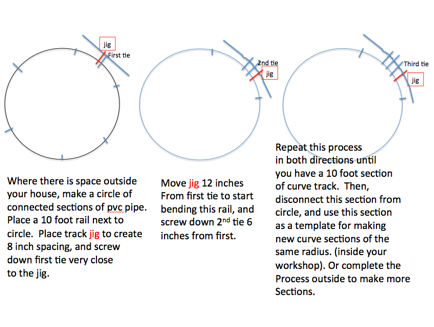
When 1 section of curved track, or straight track, is completed, then use it as a template. Just clamp new pvc pipe rails onto the existing template, and screw in ties every 6 inches as shown below. This is easy if you predrilled the 8 inch spaced holes in the ties, and preplaced the screws in the holes. Simply drill in the screws. You no longer need to use the spacing jig, or do any measuring. You are copying the template track, upside down.
Ballast:
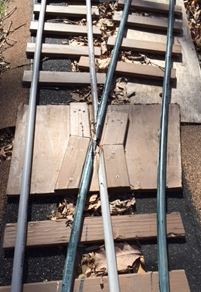
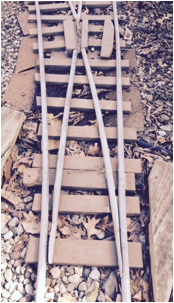
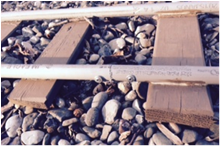
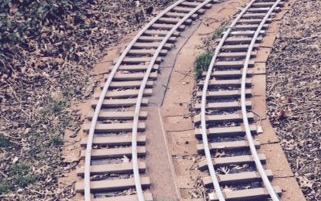
When track is placed over grass, use roofing shingles as ballast as shown below. It will protect the wood ties from ground moisture and rot. It also allows easy leveling of the track by placing thin slices of scrap wood or shingles beneath where necessary for minor leveling the ground. It provides a nice edge for lawn moving the adjacent grass. River rock or crushed stone as shown beneath the switch track is better for appearance and drainage (as shown below under the switch track)
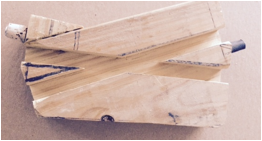
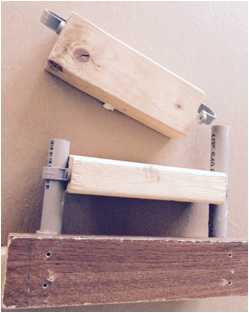
Switch tracks: Are slightly more difficult to make. I make the frogs out of pvc (my first switch is pictured lower right) or wood (which
is better). I connect the wood
frogs to pvc rail by screwing cork stoppers into the
ends as shown below to accept the rail.
I can describe making switches in more detail if anyone is interested. (email me at
larrygessman@gmail.com)